Demo
To run the first portion of our pipeline, all we need to do is run the Driver.py file with the desired parameters and feature list. This would look something like...
python Driver.py 'BFSIZE HDRSIZE NODESTATE METADATASIZE' RandomForest --maxDepth 5 --numTrees 20
And once we have run this from the terminal, we can then use the GUI to go through most of the functionality of our pipeline such as saving a model, comparing 2 models, and re-validating models. Here is a quick demo showing the steps to save, compare, and re-validate.
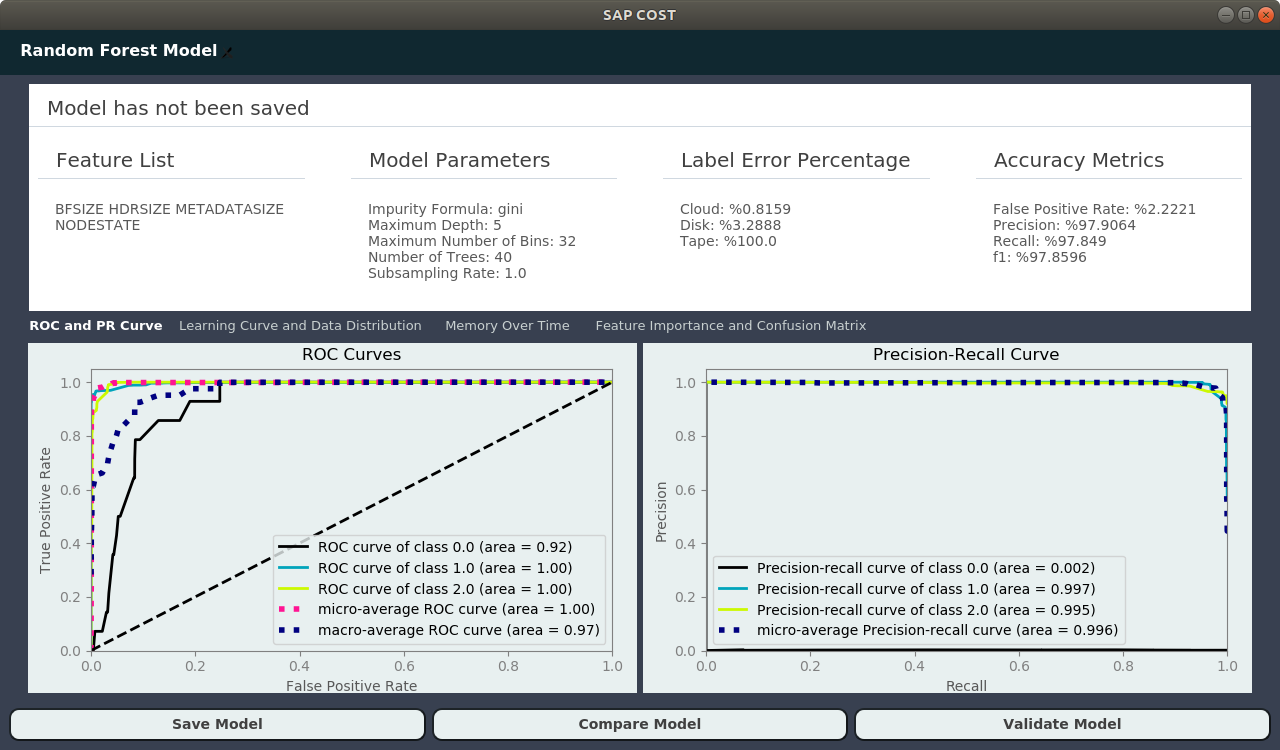
Here the model is not saved as seen in the top left of the picture.
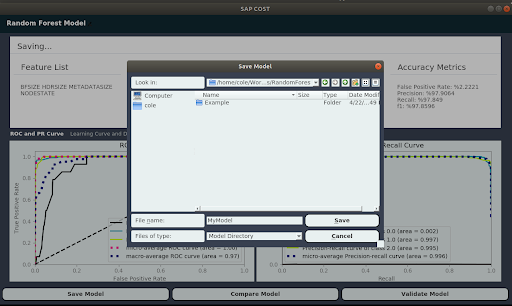
Now we hit "Save Model"
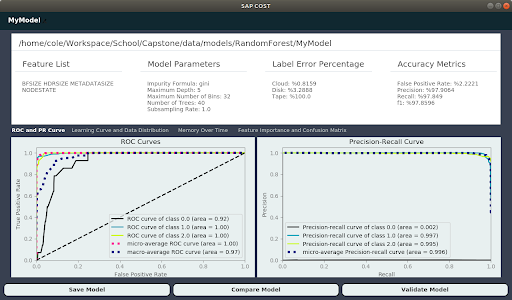
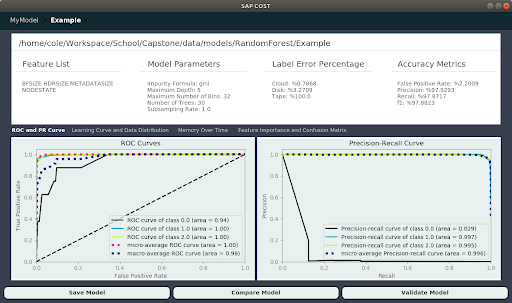
After hitting save and selecting a location we can now see in the top left the location of where the model was saved.
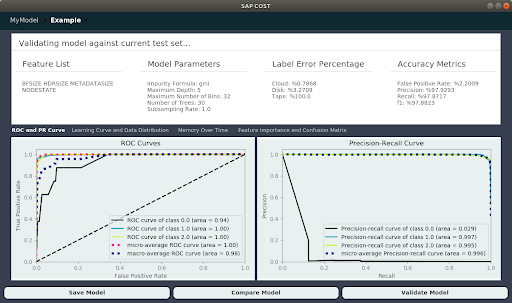
Now to compare 2 models we can select "Compare Model" at the bottom and select a previously created model.
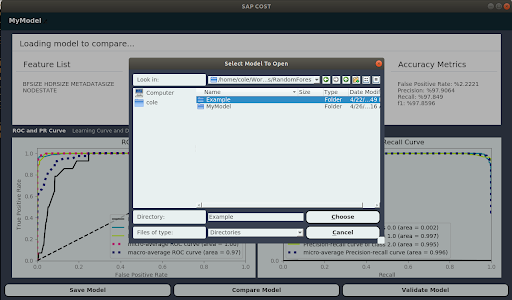
Now we have 2 models tabbed side by side for easy comparison.
And we can always validate any model with the current test set but hitting "Validate Model" on the bottom right.