
SpaceBlenders Plug-in for Blender
User Manual
Overview
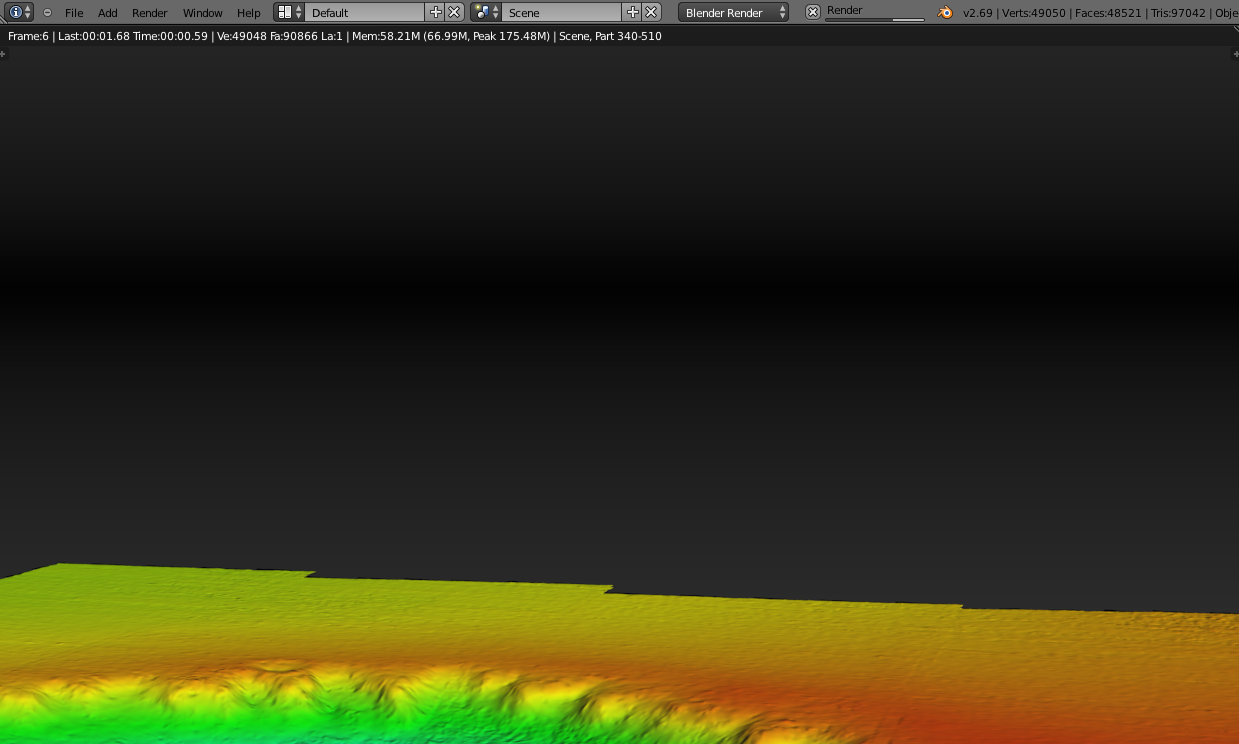
The SpaceBlenders plugin for Blender is designing to simplify the processing of DEM images in Blender. We have automated GDAL image procesing tools to create image textures simply by picking a color scheme. These textures are pre-applied to your DEM image during the import process into Blender. Creating a 3D image is as simple as selecting a couple options and clicking render. We have also taken the hassle out of creating flyover videos. Our plug-in has several pre-defined flyover paths that can be selected before importing your image. Once the image is imported a flyover video is created by simply clicking on render animation. This user guide will give you an overview of how to use our plug-in.
Our plug-in has been made cross-platform compatible for Mac, Linux, and Windows
Required Tools
Before the plug-in will work in Blender it is imperative that the following tools are installed and tested.
- Blender 2.69
- Python 2.7+
- GDAL 1.10
Setting up the Environment on a Mac
Install Blender
  echo "alias blender=/Applications/Blender/blender.app/Contents/MacOS/blender" >> ~/.profile
  source ~/.bash_profile
You should now be able to type the command: blender --version into Terminal and get
the details on
your version of Blender. Now Blender can be launched simply by typing blender into
Terminal.
Check your Python
python --version
You should see: Python 2.7.5, or greater.
Our plug-in works with all Python 2.7+, if you need to upgrade your Python version click here.
Install GDAL
    echo 'export PATH=/Library/Frameworks/GDAL.framework/Programs:$PATH' >> ~/.bash_profile
    source ~/.bash_profile
$ gdalinfo --version
GDAL 1.10.1, released 2013/08/26
Setting up the Environment in Linux
Install Blender
blenderCheck your Python
python --version
You should see: Python 2.7.5, or greater.
Our plug-in works with all Python 2.7+, if you need to upgrade your Python version click here.
Install GDAL
sudo apt-get install gdal-bin
$ gdalinfo --version
GDAL 1.10.1, released 2013/08/26
Setting up the Environment in Windows
Install Blender
set PATH=%PATH%;C:\Program Files\Blender Foundation\Blender\;
blender into the cmd prompt.
Install GDAL
OSGEO4W contains GDAL, Python 2.7.5 and Numpy.
set PATH=%PATH%;C:\OSGeo4W64
OSGEO4W into the cmd prompt should display info on the OSGEO4W package.Download the Blender Plug-in
SpaceBlender Plug-in for Blender
Install the Blender Plug-in
- Paste the following folder address into Terminal:
open /Applications/Blender/blender.app/Contents/MacOS/2.69/scripts/addons
- This will open a finder window in the Blender addon directory.
- Drag and drop the entire folder into the directory.
- From your file browser click on File System > usr > share > blender
- In the Blender folder click 2.69 > scripts > addons
- Then drag and drop the entire folder into the directory
- Paste the following into the cmd prompt and hit enter:
explorer C:\Program Files\Blender Foundation\Blender\2.69\scripts\addons
- This will open an explorer window in the Blender addon directory.
- Drag and drop the entire folder into the directory.
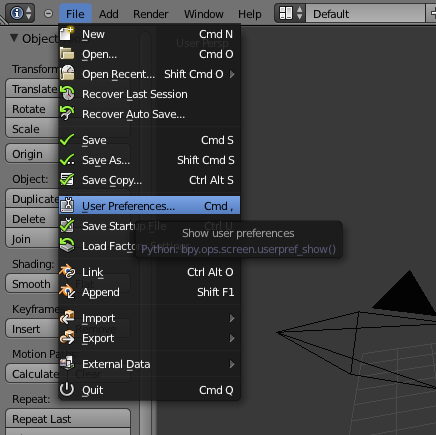
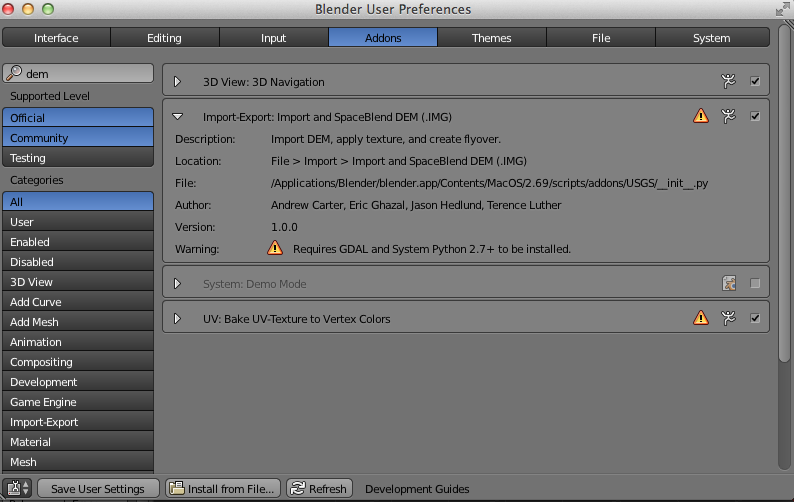
Activate the Blender Plug-in

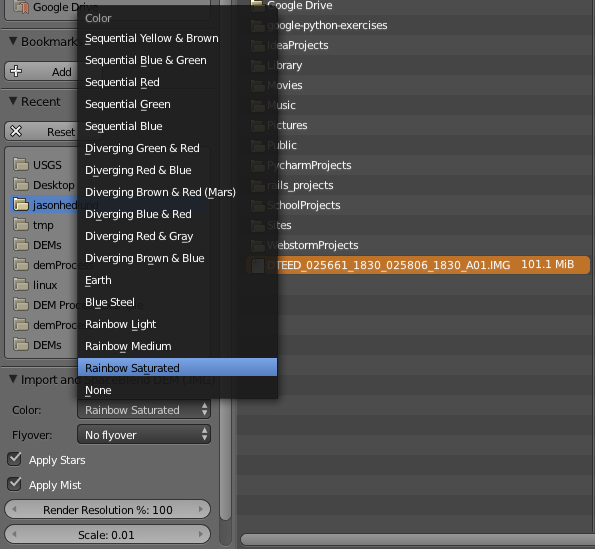
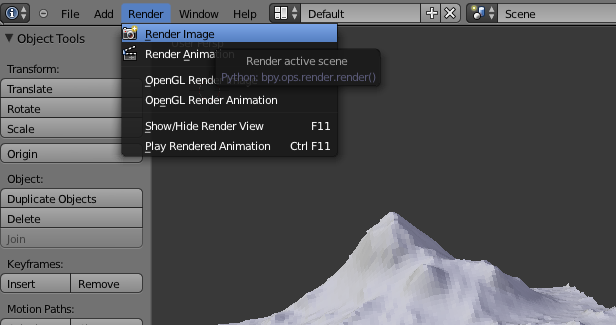
Creating a 3D Image

- Note: The import process can take several minutes depending on your image size

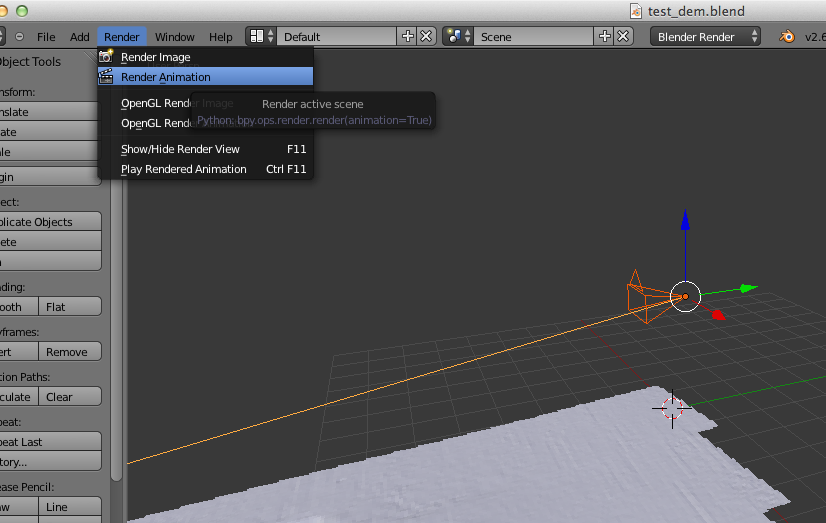
Creating a 3D Flyover Video
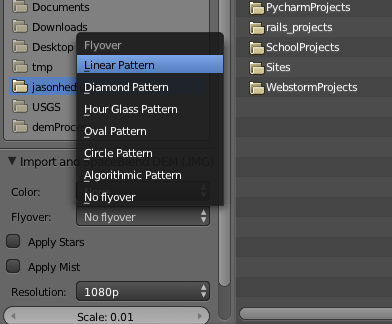
- Note: The import process can take several minutes depending on your image size
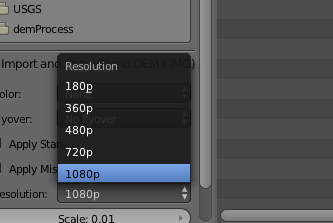
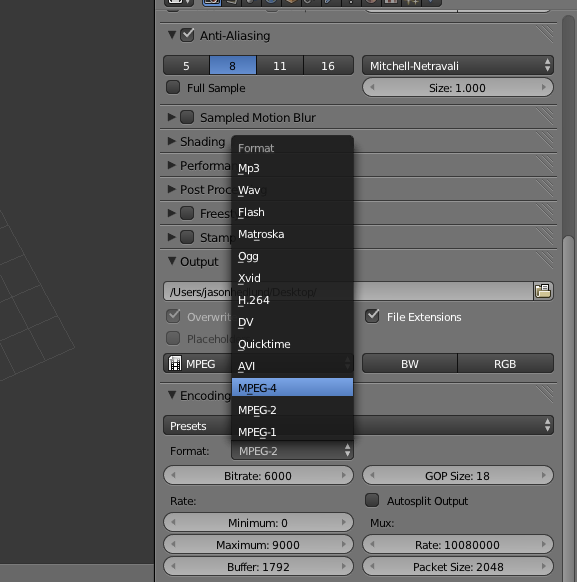
Changing Rendering options

2014 Capstone Team - Northern Arizona University
Note: All images used in this user-guide are the trademarks of their respective companies. We are not claiming any affiliation with any of these companies, and do not mean to infringe on copyrighted material.